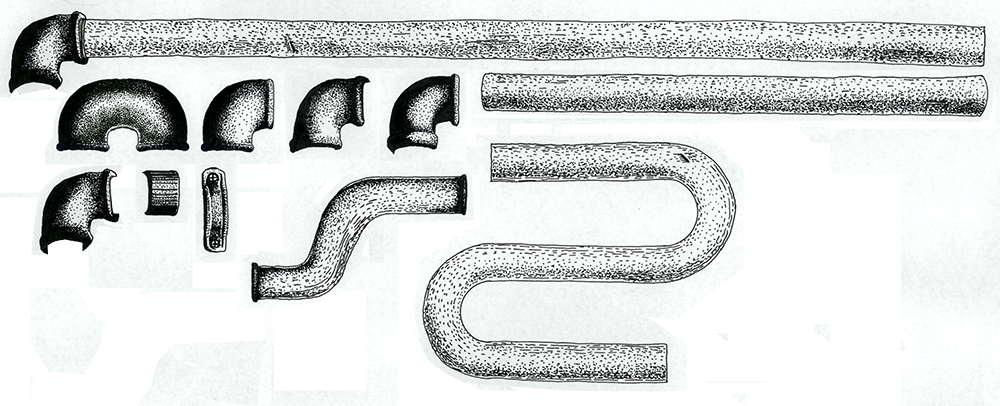
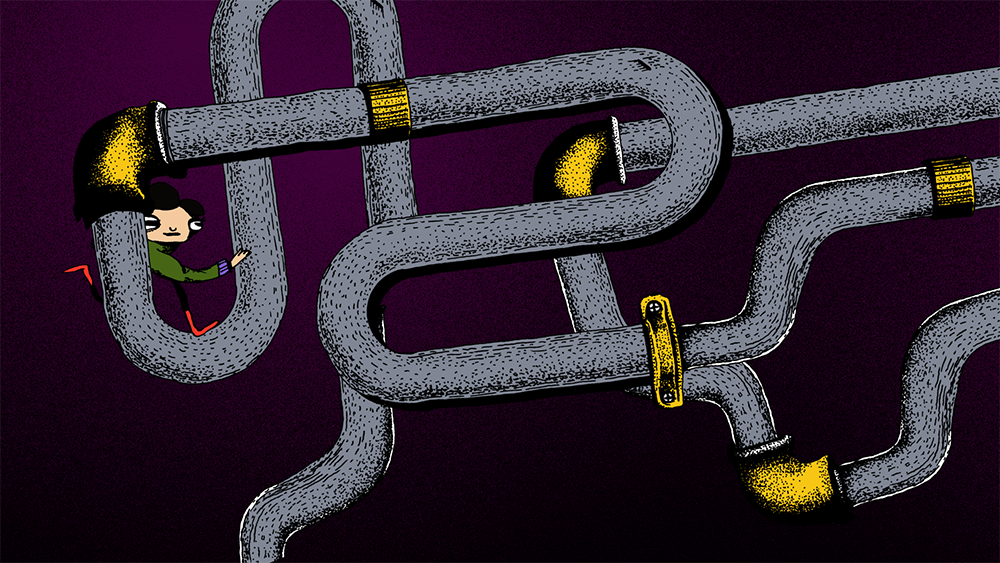
Here’s a set of elbows and pipe shapes which I’ll use to build an environment for various shots in my current film in a scene set in a refinery. I started on paper, inked them, scanned them and arranged into a something resembling a sprite sheet.
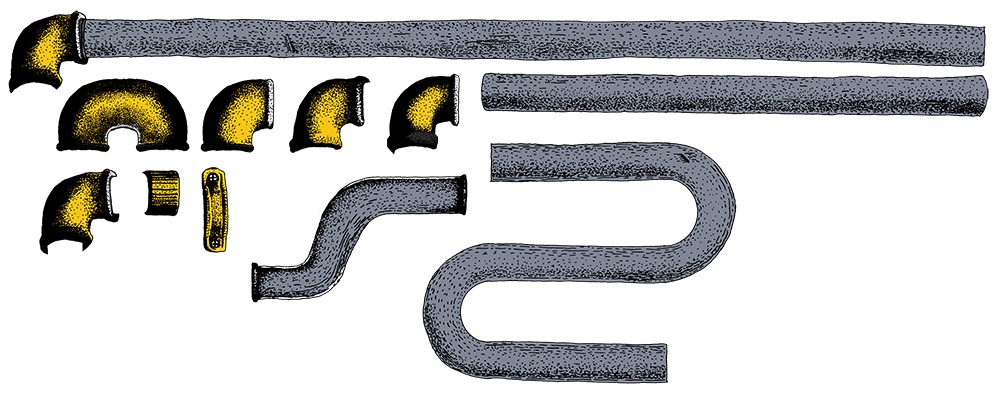
Next I used TVPaint’s Scan Cleaner Black & White effect to remove the paper texture (you can accomplish the same thing in Photoshop, via this free set of actions from Shazim Creations), then added color on a layer underneath. Typically I export the clean linework layer and the color layer separately. That way I can adjust them apart from each other in After Effects, if need be.
Once in AE, I make a precomp with my linework on top of my color.
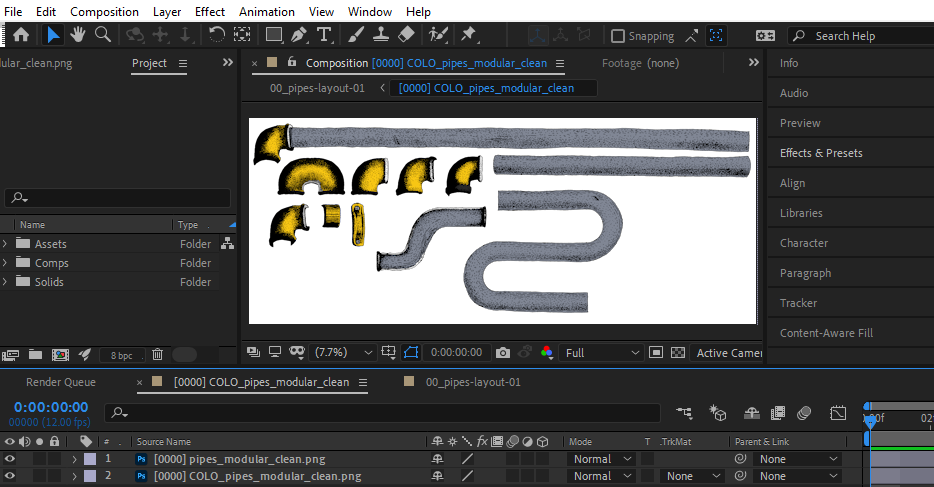
Then, I make a new comp the size of my final scene, and collage together my bg out of the modular elements. Each layer is the previous “sprite sheet” comp, but I’ve masked it to show just the element I need.
Here’s the first frame of a very wide panning background made entirely from the modular pieces pictured above, along with a solid and a few layers of scanned in airbrush texture.
This method combines the best of paper cutout (movable, reusable, modular elements) with the best of digital (infinite, instantaneous duplication of those elements).
That’s a huge timesaving benefit, especially for people with high-detail drawing styles, who make work on their own, and need to find efficiencies that won’t compromise their visual aesthetic.
In summary:
Step 1: Draw and color your modular elements.
Step 2: Duplicate, flip, rotate, scale, and overlap those elements to build out the scene.
As an added bonus, working this way enables you to use any of these elements as overlays (with scales and positions cheated, for example, to quickly create a closeup of a character intended for the same scene). You can also draw your original assets at multiple scales, or if you’re ok with a line-width mismatch, scale them digitally, or place the same set of assets at different distances from camera in z space. Pairs well with subtle camera movements (instant parallax!).
For further ideas on how far to break down your elements, check out Spriter’s Resource, particularly sheets filed under Backgrounds and Miscellaneous.
This series continues with Modular Background Design Part 1: Scan Prep in TV Paint. Part 1 also includes the TV Paint fx presets mentioned above, as a free download.
DIY Animation Club co-founder Dave Merson Hess taught and developed animation curriculum for Aurora Picture Show’s youth workshops, 2014-2018. He also started Rush Process, a Gulf Coast-based festival celebrating animators who work with physical media, which ran from 2015 to 2018. Dave is currently an MFA candidate in Experimental Animation at Calarts.
One response to “Modular Background Design, Part 0: Overview & Reasons”
[…] understand more about the why’s of this method, check out the original article on modular background design (let’s start calling it Part […]