
I first learned about this setup from friends in a drink-and-draw group at Rudyard’s in Houston. Several animators I know use variations on it. It’s much cheaper than buying an Artograph-type light box (tough to find new for under $100!), and way more portable, since you won’t need a power outlet for it to work.
A quick note on longevity: I’ve made this setup twice. The x-factor is the build quality of the lightboard. The first lightboard I bought lasted about 2 years before it failed. I’m currently about a year in to my second lightboard. They aren’t made super well, it’s true. But they’re a lot more affordable than art store options, and I love the mobility they give you vs. their bulky desktop cousins.
Plein air animating on paper? Let’s go!
Things you’ll need:
- One of those ubiquitous A3-size LED lightboards, found easily on eBay, Amazon, etc. (~$20 — when I made my graphic they were $25, but recently prices have come down a bit!). These are sold under various brand names (Huion, AGPtek, etc.), and are sometimes labeled as “tracing boards” or “tattoo led boards” but in my experience they’re basically all the same!
- A plastic or metal pegbar (round or ACME pattern — Lightfoot, Blick, LOONENG, MyLifeUnit, etc.) (~$8)
- A cheap clear clipboard from the interwebs or any office supply store (~$7)
- A 5.0V 2A portable USB charger (~$5)
First, I tape my clipboard to the lightboard lengthwise, with two long strips of clear packing tape. Make sure you mount the clipboard flush to one side of the lightboard to leave some space on the opposite side for the pegbar.
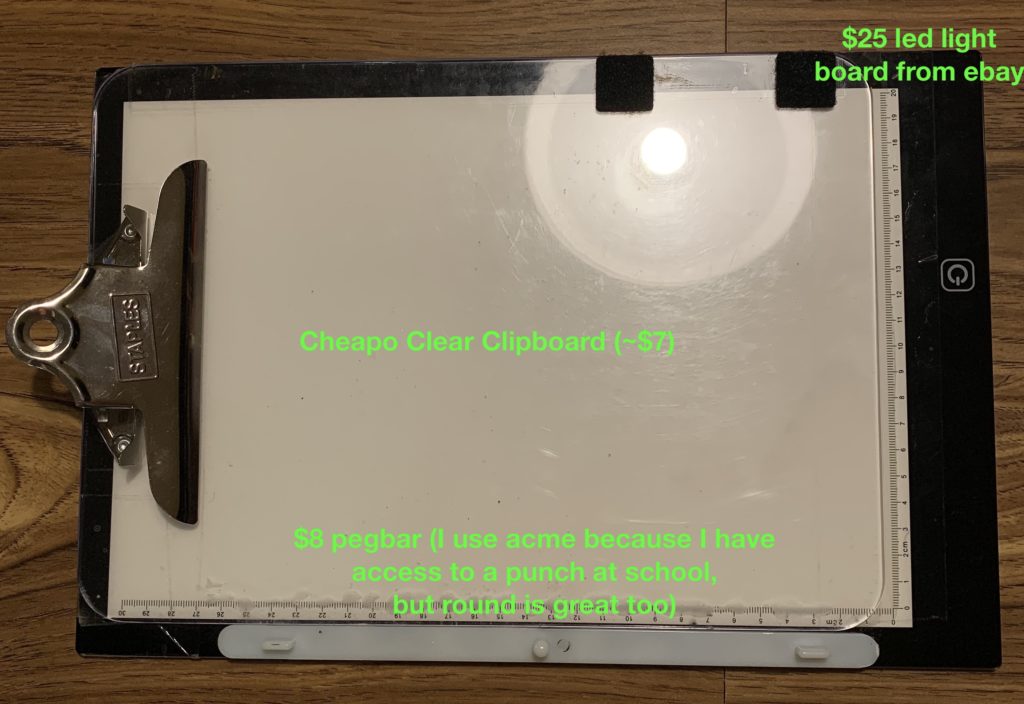
Next, I glue my pegbar directly to the lightboard with super glue, on the empty side of the lightboard, not quite centered, but actually shifted to the right a bit. To get the placement right, put a piece of punched paper onto your pegbar (the one pictured here is from Lightfoot Ltd btw) and use it as a guide, making sure the whole page has space to fit into the clipboard’s metal clip.
Keep in mind that if you’re a top pegs person who flips to check your animation, the clip can get in the way of that. If you’re a bottom pegs animator and you roll instead of flipping, you’re good to go.
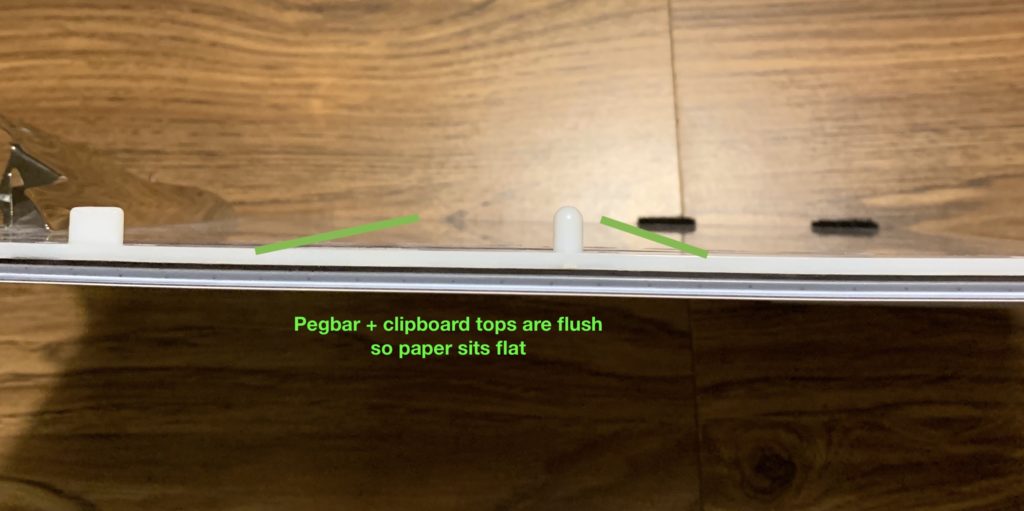
Because your standard clear clipboard is about the same thickness as your average plastic pegbar, your paper sits flush against your drawing surface!
Other benefits:
- The clipboard means you can throw your setup — stack of blank 10f paper and all — into a backpack, knowing your pages are secure.
- The clipboard provides some structural support to the lightboard. If you’ve used these LED lightboards, you know they’re super thin and feel a bit flimsy out of the box. With the clipboard, they feel a lot more rugged.
- Having the pages securely under the clip as you work means you don’t have to worry about your frames flying everywhere when you’re animating outside. Which I recommend. Go to a park and sit in the grass, or on some concrete stairs. Find a little a shade, a little breeze, and animate anywhere!
If you have any velcro lying around, use it to attach the powerbank to the bottom of the lightboard. If not, use tape, or put it in your pocket instead. The ubiquitous A3 lightboard pictured here comes with a USB cable, so no worries there.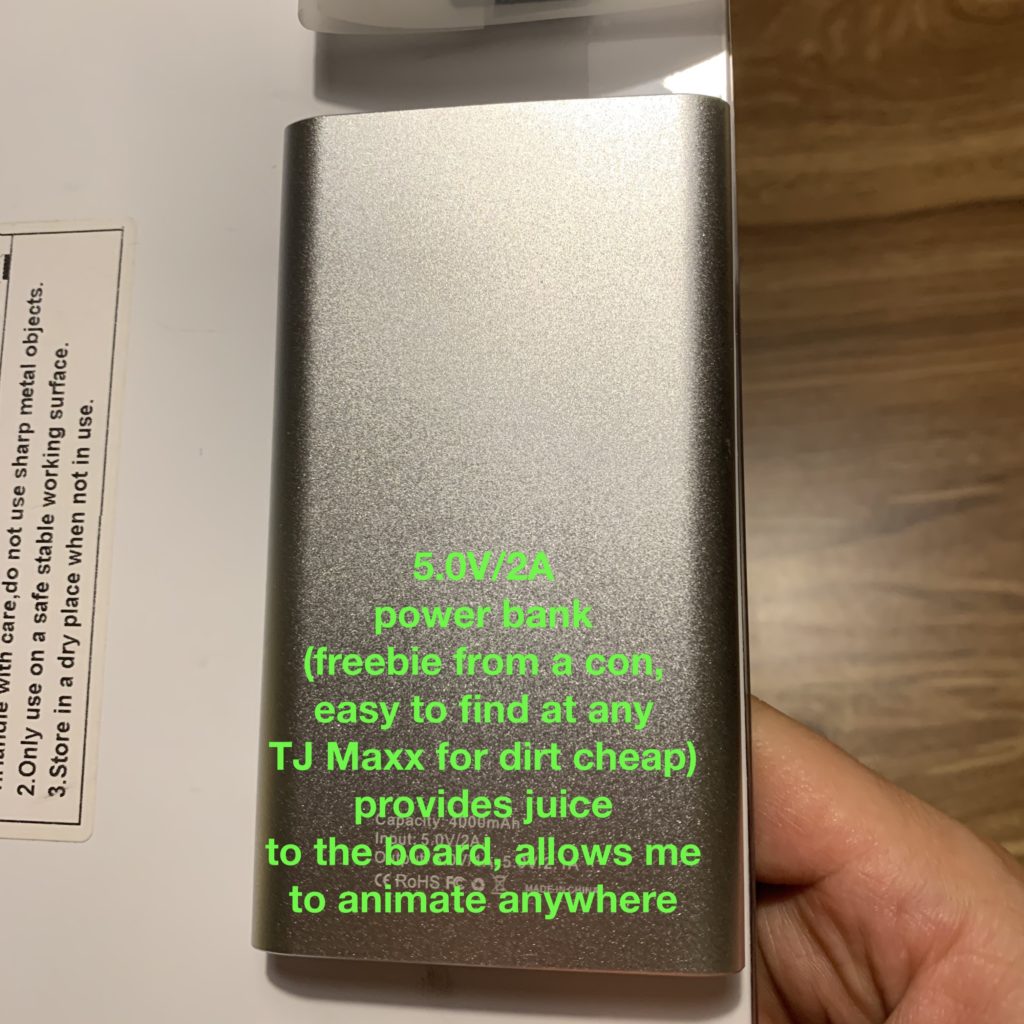
DIY Animation Club co-founder Dave Merson Hess taught and developed animation curriculum for Aurora Picture Show’s youth workshops, 2014-2018. He also started Rush Process, a Gulf Coast-based festival celebrating animators who work with physical media, which ran from 2015 to 2018. Dave is currently an MFA candidate in Experimental Animation at Calarts.
Leave a Reply
You must be logged in to post a comment.